Introduction: The Critical Role of a Professional Roof Inspection
In the realm of property maintenance, the roof is often described as a building’s first line of defense against the elements. However, despite its critical importance, it is frequently the most neglected component until a failure occurs. According to industry data, nearly 80% of roofs are replaced prematurely because property owners fail to perform routine maintenance and inspections. Understanding What Happens During a Professional Roof Inspection? is the first step toward extending the lifespan of your roofing system, protecting your interior assets, and ensuring the structural integrity of your home or commercial building.
A professional roof inspection is far more than a cursory glance from the driveway. It is a comprehensive, multi-point evaluation performed by specialized technicians who understand the physics of water shedding, the chemistry of roofing materials, and the structural requirements of local building codes. In today’s market, where climate volatility is increasing, a detailed inspection serves as a vital risk mitigation strategy. This article provides an exhaustive deep-dive into the technical processes, methodologies, and reporting standards that define a high-quality professional roof assessment.
The Preliminary Phase: Consultation and Historical Analysis
Before a technician ever sets foot on a ladder, a professional inspection begins with data collection. The inspector will typically interview the property owner to understand the history of the structure. Key questions include the age of the current roof, the frequency of past repairs, and any specific areas of concern, such as localized leaks or unusual noises during wind events.
Reviewing the historical performance of the roof allows the inspector to look for patterns. For instance, if a specific valley has leaked multiple times, it may indicate a fundamental design flaw or an installation error rather than simple material degradation. This phase also involves a review of any existing warranties, which may dictate specific maintenance requirements to remain valid.
Phase 1: The Exterior Perimeter and Ground-Level Assessment
The inspection technically begins on the ground. By walking the perimeter of the property, the inspector looks for “clues” that suggest roof-level distress. This holistic approach ensures that no symptom is overlooked.
Gutter and Downspout Evaluation
Gutters are the primary drainage system of the roof. Inspectors look for granule loss in the gutters—a common sign of asphalt shingle aging. If the gutters are filled with sand-like granules, the shingles are losing their UV protection and becoming brittle. They also check for proper pitch, secure fastening, and signs of “back-splash” or overflowing, which can rot the fascia boards and damage the foundation.
Siding, Soffit, and Fascia Inspection
The inspector examines the intersection where the roof meets the walls. Water stains on siding or rotting wood on the fascia often point to failing drip edges or improper flashing. They also check the soffit vents to ensure they are not obstructed, as restricted airflow is a leading cause of attic heat buildup and subsequent shingle “cooking.”
Phase 2: The On-Roof Surface Examination
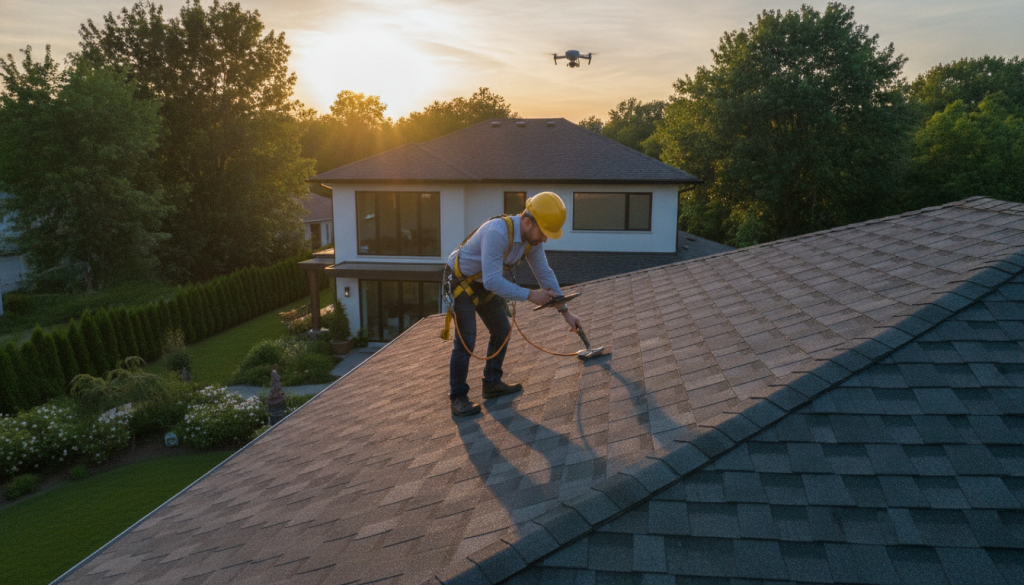
This is the most critical and physically demanding part of the process. The inspector ascends to the roof (or uses high-resolution drones if the pitch is too steep) to perform a hands-on evaluation of the roofing membrane or shingles.
Material Integrity and Degradation
For asphalt shingles, the inspector looks for curling, cupping, cracking, or “fish-mouthing.” For tile or slate roofs, they check for hairline fractures and slipped components. In metal roofing, the focus is on fastener tightness and the integrity of the protective coatings. Every material has a specific failure profile that the inspector is trained to identify.
Flashing: The Most Vulnerable Points
Statistically, over 90% of roof leaks occur at flashing points. Flashing is the thin material (usually galvanized steel, copper, or aluminum) installed to direct water away from critical areas. The inspector will meticulously check:
- Chimney Flashing: Ensuring the counter-flashing is properly regleted into the masonry.
- Step Flashing: Checking the transitions between the roof and vertical walls.
- Valley Flashing: Looking for corrosion or debris buildup that causes water to “dam” and move sideways under the shingles.
- Vent Boots: Inspecting the rubber or neoprene seals around plumbing stacks, which often dry-rot long before the roof itself fails.
Penetrations and Sealants
Every hole cut into a roof—for skylights, HVAC units, or attic fans—is a potential leak site. Professional inspectors check the caulking and sealants used at these sites. They look for UV degradation, where the sealant has become brittle and pulled away from the substrate, creating a path for capillary action to draw water into the structure.
Phase 3: Structural Integrity and Load Analysis
A roof is not just a surface; it is a structural system. During a professional inspection, the technician evaluates the “lines” of the roof. Any sagging along the ridge or dipping in the planes of the roof can indicate serious structural issues.
Decking Health
The inspector will often perform a “walk test” to feel for soft spots in the roof decking (the plywood or OSB sheets under the shingles). Soft spots suggest that water has bypassed the outer layer and is rotting the wood underneath. This is a critical safety issue and a major cost driver if not addressed early.
Comparative Inspection Methodologies
The following table outlines the different levels of professional inspection techniques used depending on the building’s needs:
| Inspection Type | Primary Tools Used | Best For | Key Benefit |
|---|---|---|---|
| Visual Physical | Ladder, Chalk, Camera | Standard Residential | Identifies immediate surface damage. |
| Drone/Aerial | 4K Cameras, Thermal Sensors | High-Pitch / Large Commercial | Safety and high-detail mapping. |
| Infrared (IR) | FLIR Thermal Cameras | Flat Roofs / Commercial | Detects trapped moisture under membranes. |
| Moisture Mapping | Electronic Moisture Meters | Post-Storm Assessments | Quantifies the extent of water intrusion. |
Phase 4: The Interior Attic Inspection
Perhaps the most overlooked part of a professional roof inspection occurs inside the building. The attic provides the “underside” view of the roofing system, which often reveals leaks that are not yet visible on the ceiling of the living space.
Detecting Active Leaks and Water Stains
Inspectors look for water tracking along rafters, rusted nails (a sign of high humidity or slow leaks), and mold growth. Even if the attic is dry during the inspection, dark staining on the wood indicates past or intermittent moisture issues.
Ventilation and Insulation Analysis
A roof’s longevity is tied to the temperature of the attic. The inspector calculates the balance between intake (soffit) and exhaust (ridge/gable) vents. Improper ventilation leads to ice damming in winter and shingle degradation in summer. They also check that insulation is not blocking the airflow, which is a common mistake made by DIYers or inexperienced contractors.
Phase 5: The Comprehensive Inspection Report
The culmination of the process is the delivery of a detailed, written report. This document is a legal and technical record of the roof’s condition. A high-quality report should include:
- High-Resolution Photography: Visual evidence of every defect found.
- Life Expectancy Estimate: An expert opinion on how many years of service remain.
- Prioritized Repair List: Distinguishing between “immediate needs” (leaks) and “preventative maintenance” (sealing vents).
- Compliance Check: Ensuring the roof meets current local building codes and manufacturer installation requirements.
The Economic Value of Professional Inspections
Investing in a professional inspection provides a significant Return on Investment (ROI). For a nominal fee, property owners can avoid the $15,000–$30,000 cost of a premature roof replacement. Furthermore, for those looking to sell their property, a certified roof inspection report serves as a powerful “trust signal” to potential buyers, often preventing price negotiations based on roof uncertainty.
Frequently Asked Questions
1. How often should I have a professional roof inspection?
Experts recommend a professional inspection at least twice a year—once in the spring and once in the fall—and after any major weather event involving hail or high winds. This cadence ensures that seasonal damage is caught before it compounds.
2. Will my insurance company pay for a roof inspection?
Typically, insurance companies do not pay for routine maintenance inspections. However, if you suspect storm damage, they may cover the cost as part of a claim, or many reputable roofing companies offer specialized “storm damage assessments” that are designed to interface with insurance adjusters.
3. How long does a professional inspection take?
For a standard residential home, a thorough inspection takes between 45 minutes and 2 hours. Commercial properties or complex architectural designs may take significantly longer, especially if infrared moisture mapping is required.
4. Can I just inspect the roof myself?
While a homeowner can spot obvious issues like missing shingles, they lack the specialized tools (like moisture meters and thermal cameras) and the technical knowledge to identify subtle signs of failure, such as compromised flashing or structural sagging. Furthermore, walking on a roof is dangerous and can actually damage the shingles if done incorrectly.
5. What is the difference between an inspection and an estimate?
An estimate is a quote for the cost of a specific job. An inspection is a comprehensive diagnostic evaluation of the entire system’s health. A professional inspection report is much more detailed and focuses on the “why” and “how” of the roof’s condition, rather than just the price of a repair.
Conclusion: Protecting Your Most Valuable Asset
In conclusion, understanding What Happens During a Professional Roof Inspection? reveals the complexity and technical rigor required to maintain a secure structure. From the initial ground-level survey to the high-tech infrared analysis of the attic, every step is designed to identify vulnerabilities before they escalate into catastrophic failures. A professional inspection provides peace of mind, financial security, and a clear roadmap for property maintenance. By treating your roof as a sophisticated system rather than a static cover, you ensure the longevity of your investment and the safety of everyone beneath it. Do not wait for a leak to reveal a problem; schedule a professional assessment today to stay ahead of the weather.